EE 350hp 0-6-0 shunter (Class 08)
One of the kits I've been putting off building for some time is the Modern Outline Kits model of the standard English Electric BR 350hp diesel shunter, otherwise known as the Class 08.
I found this one of the most difficult kits I've built largely because of the very poor instructions and what I consider to be over-complicated slot and tab system of aligning and positioning parts.
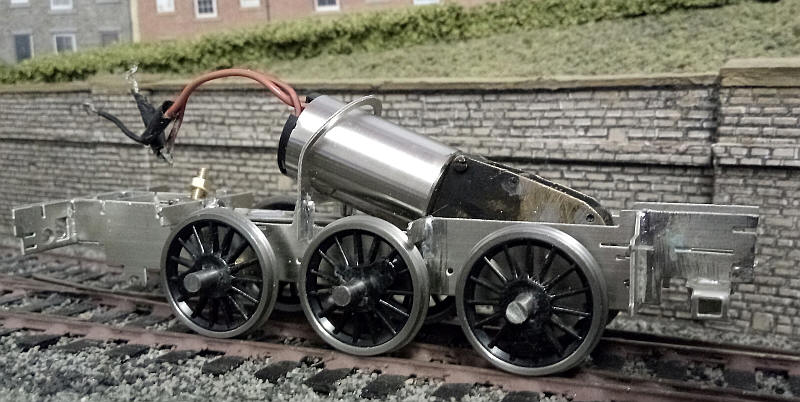
Originally I intended to use an RG4 Portescap motor but shortly after this photo was taken I replaced it with a Mashima motor and Markits gearbox. The wheels are Alan Gibson mounted on 1/8th inch diameter rod cut to length.
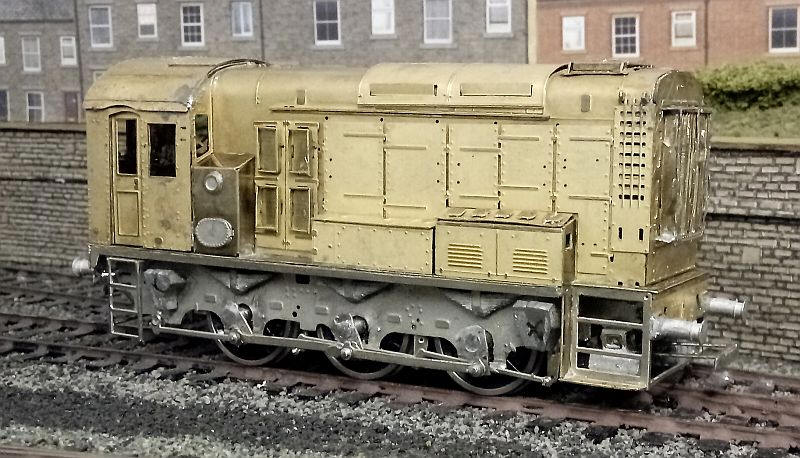
I decided not to detail construction as usual so here is a photo of the largely completed model.
The major challenge of the construction is the fitting of the outside cranks. Originally, I experimented with using Gibson plastic ones but these proved not be up to the job and easily moved on the axles. Reading about how other modellers tackled this problem I came across a description of how to make them from sheet nickel silver . One crank was made with small holes drilled for the centre point of the crankpin and for the axle. This was then used as a template to drill the holes for the other cranks. The axle hole was opened out with braoches until it was an interference (very tight fit) on the axle end. The cranks were then cut to shaape with nothing more sophisticated than a pair of sharp scissors!! The crankpins were Alan Gibson's secured in place with the threaded spacers that come with them. The crankpin was also soldered to the back of the crank so they were securely locked in place.
To start the process of quartering the cranks for one axle were positioned at roughly 90 degrees to each other and after applying flux soldered flush to the end of one of the axles. The second axle was treated in the same way but only one crank was secured with solder. The first pair of rods was put over the crankpins and the chassis rolled. Once I was happy that the cranks were quartered the crank was soldered to the axle. This process was repeated for the third axle to give a smooth rolling chassis.
For electrical pickup I have put nickel silver wire contacts bearing on both the back of the wheels and also pressing down onto the top of the treads. This is very much a "belt and braces" system but with a short wheelbased rigid chassis is probably a good idea.
The model was heavily weighted with lead and runs smoothly and pulls an acceptably heavy load.
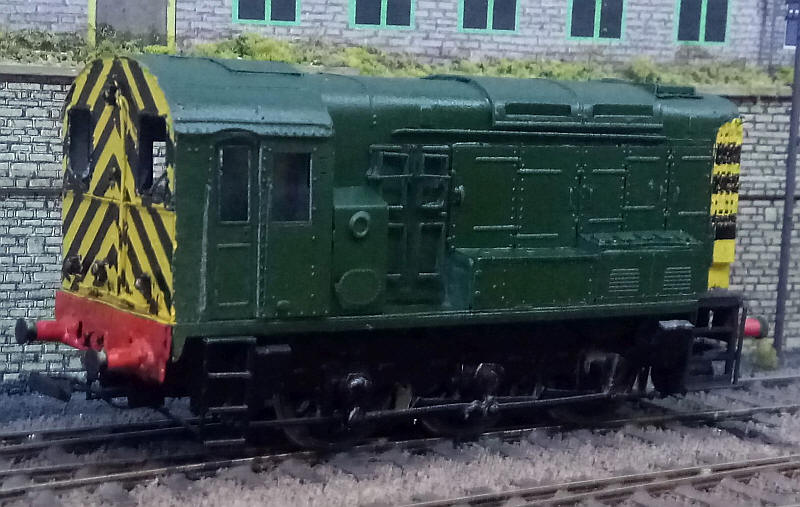

The model awaits lettering and glazing. The yellow and black chevrons were drawn using a base colour of yellow with a permament ink overhead projector pen being used for the black chevrons. The ends have lines etched on them which make sthis task easier.