Metal Bodied Carriages
Although I've built several square panelled Midland Railway carriages from cardboard with plastic strips representing the beading, I've decided to use metal sides for the round panelled stock. There are several reasons for this. The first is that I don't relish the constructional problems that cutting out a fret of thin plastic panelling entails. The second reason is the availability of etched brass carriage sides of the very prototypes I want to run on Halifax.
By using the etched sides from Worsley Works I can build larger quantities much faster, and with a more accurate appearance than I could if I totally scratchbuilt these vehicles. The basic construction of the models will follow exactly the same method as my card-bodied models with the exception of the sides. Thus the models will be semi-scratchbuilt.
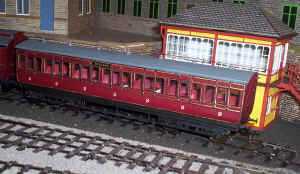
To start the process I've already constructed a zinc sided coach produced some years ago by a Mr Charlton. The results can be seen in the photo below. The only difference in construction to my card coaches is that I've used plasticard to produce the internal carriage structure, to which the sides are attached with Araldite. The arc roof was built up on a base layer of thick card to which further strips, each slightly narrower than the last were added until a rough roof profile was obtained. On top of this I glued two layers of thin card to represent the outer roof surface.
WORSLEY WORKS KITS
I decided to purchase 4 round pannelled Bain express clerestorey coach kits from Worsley Works. These comprise body and clerestorey sides plus ends. The rest of the model used the construction techniques as above: a solid plasticard sub-structure and interior together with one removable end to allow the glazing to be fitted. The ends come with slot and fold end steps and holes etched for the wire handrails. Coach sides also have holes for the door handles and grab handles etched.
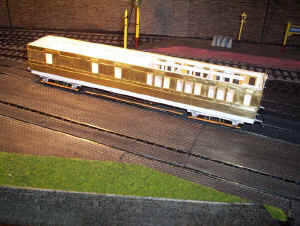
Views of body with one end permanently attached
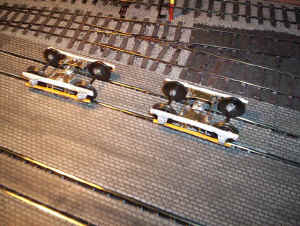
For my cardboard bodied coaches I needed 10' wheelbase bogies so I used stretched 4mm scale MJT bogies with Ratio plastic bogie sides stretched to give an S Scale wheelbase of 47.6mm. However, for the Bain coaches which had only an 8' wheelbase I needed a different technique. I decided to use the MJT 10' wheelbase unaltered which gives a wheelbase just under 2mm too long in S Scale. Originally I'd intended to fit Ratio bogie sides as well but I discovered that Ratio don't sell the bogies separately any longer. The photos show what I've done:
All the unnecessary brass work has been cut away and the bogies made more rigid by soldering some cross pieces of brass across the bogie tops.
I cut plasticard to represent the bogie frame and axlebox supports and glued these to the brass.
S Scale Society cast MR coach axleboxes and wagon springs were also glued on over the bearings.
The footboards are made from 3mm scale copperclad sleeper strip held in place by various brackets of brass wire, and also glued to the underside of the axleboxes.
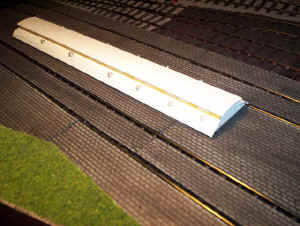
I felt it essential that the clerestorey roofs on these coaches were as identical it is possible to make so I've tried a new method.
A thick piece of plasticard is cut to fit snuggly inside the top of the coach body.
Onto this a wider piece is fastened so that its edges are in line with the brass sides.
Plastic for the central clerestorey walls are attached making a little allowance for the brass clerestorey sides.
A box structure is built up between these sides to give a rigid foundation for the middle section of the roof.
On either side of this central section further strips of plasticard are glued so as to build up a rough substructure for the actual outer roof.
Before adding the roof itself I glued the brass clerestorey sides in places.
I now used some fairly thin but good quality cardboard for the three sections of the actual outer roof surface, rather than using laminated paper, as in my square panelled coaches.
These pieces were rolled to the correct curvature and the underside coated with a layer of Araldite. When attached to the plastic substructure and allowed to set the epoxy gives considerable extra strength to the card.
Microstrip plastic was attached to the eaves of the roof with solvent, and rainstrips and gas light covers were put in place. Photos suggest that not all these coaches had ventilators to I've left them off.
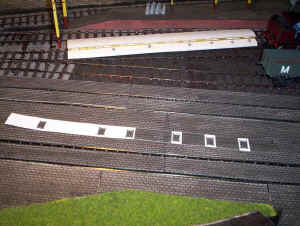
To simulate the carriage door droplights I've used an old dodge of applying self-adhesive labels to the plastiglaze strip. Careful work with a sharp point and a scapel allows the droplights to be formed quickly and neatly - I think this is a much better way than soldering the droplights in place on the back of the sides. it also makes it easy to slide the glazing for the entire side into place. Finally the guard's lookouts are added from shaped plasticard blocks.

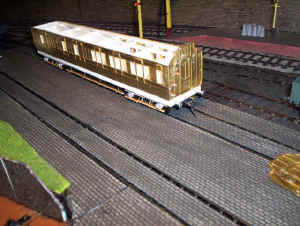
The structurally complete model (apart from the lookouts and corridor connections) ready for painting.
Once the model had been painted and lined the final step was to build the corridor connections. These are built up out of twelve alternating 14mm and 16mm by 30mm rectangles of black plasticard. The tops are then trimmed and filed to give the curved top and a piece of black paper secured on top to represent the canvas covering. The whole unit is then glued over the etched door and painted a black/ brown colour.
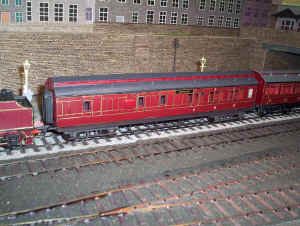
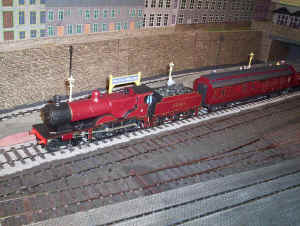
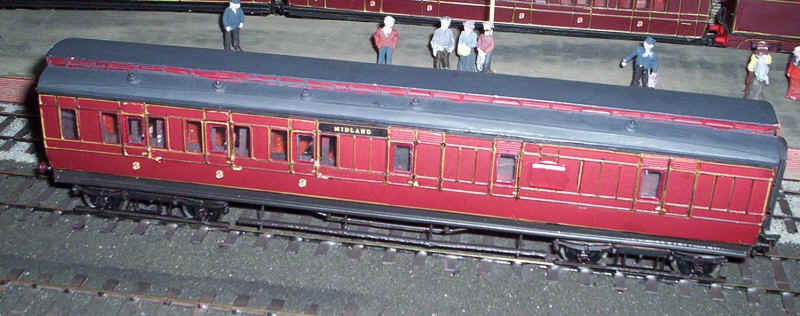
The completed model ready to leave Halifax Midland for St Pancras.
For a long time I've put off the task of adding door handles and the grab handle next to it. I tried to convince myself that it didn't really matter. Of course it does! The carriage looks naked without them. Click on the image below to see what it looked like on Steve Flint's super photo.

Something had to be done and fortunately Worsley Works have made the task slightly easier by half etching the holes for the handles. Luckily the paint hadn't filled them up so I took a deep breath and carefully drilled holes with my electric drill . Fortunately the only damage the paint suffered was on the raised beading and this was quickly touched up with black OHP ink.
As the glazing is in place it's necessary to drill through this as well. Some etched handles were inserted and I bent up the grab handles from .33mm brass. A smearing of Araldite has secured them in place. Fortunately for my nerves the other three coaches haven't been painted so holes have been pre-drilled. The photo below shows the improvement in appearance.