New multi location layout
Having started to build S Scale models of German outline locomotives and rolling stock I now had to face the inevitable question of where to run them. Clearly I needed a new layout and the only space available was above Halifax Midland. After a lot of thought I decided that it was possible to fit in a typical German branch line station provided I was prepared to use the Hebblethwaite layout as a fiddle yard.
The plan was for a three loop station (a typical arrangement found throughout Germany) with a couple of sidings. The station would be linked to Hebblethwaite via a curve and a point from the goods arrival line. The only alteration necessary to Hebblethwaite would be to lift the bridge about 5mm to give sufficient clearance for the larger German profile.
I decided to build the layout using the rails from old Peco Code 100 points and flexible track soldered to paxolin copperclad sleeper strip. This meant that I wouldn't have to do any heavy filing of rails, something which I don't like doing nowadays. Basically, the method for converting the points follows these stages. I used the large radius and the curved points which allows radii of between 36 and 60 inches to be formed. The main stages in producing the S Scale points are these:
Using side cutters snip the plastic sleepers on either side of the crossing V (frog), the closure rails and the point blades so that the outer stock rails can be removed.
You are now left with a unit made up out of the crossing V (frog), the closure rails and the point blades. I usually unclip the point blades from the closure rails at this stage.
Remove the sleepers from the crossing V rails a few at a time and replace a couple with copper clad sleepers to maintain the alignment of the rails.
Repeat this for the closure rails but at this stage don't disturb the actual crossing as these have moulded plastic inserts and we want to keep these as far as possible to ensure correct alignment through the crossing.
Turn this unit upside down and remove the plastic under the crossing by cutting away with a razor saw and file. You will be left with a thin layer of plastic around the base of the rails. This will be useful to retain for later on. Copper clad sleepers can now be soldered to the outside of these rails .
If using the large radius point I now refit the point blades and start soldering the stock rails to the sleepers and the crossing end of the point. You need to ensure that the point blades fit into the recesses on the stock rail. At this stage I also lay the partially completed point on a diagram marked out for sleepers at the correct spacing. I use double sided sellotape to hold the sleepers in place.
Construction now follows the normal process for constructing point with the straight stock rail laid first, followed by the curved stock rail. You'll need to make some adjustments to the alignment of the curved closure rail to ensure that the rails all line up correctly and a 48 inch radius curve is maintained through the point. This is easier to do than to explain.
The point blades can be fixed to the closure rails using either the special fishplates from the original Peco point or just by using normal fishplates - there will be sufficent freedom of movement using these.
The tiebar uses a strip of sleeper strip.
Check rails are soldered in placing opposite the crossing and the point checked for running using a wagon. The closure rails are gapped as for any live fog point and then gaps are cut in the copper of the sleepers.
The entire process takes less than an hour to produce a point that is suitable for S scale using wheels of the EM Gauge profile by Alan Gibson or Jackson coach and wagon wheels.
If using the curved points that Peco make you will need to insert an extra length of rail about 40mm to extend the closure rails. This is so that a minumum radius of 36 inches can be maintained on the inner curved line. Obviously the outer stock rails will also need extending at the crossing end by teh same amount.
Now many will question the point of what I've done but in my defence the reason for doing this is that with the frequent discomfort I feel in my right hand I prefer to reduce the amount of heacy filing I do and this is why I've adopted this method.
The new layout
The track to the new layout joins on to the goods run round line at Hebblethwaite.
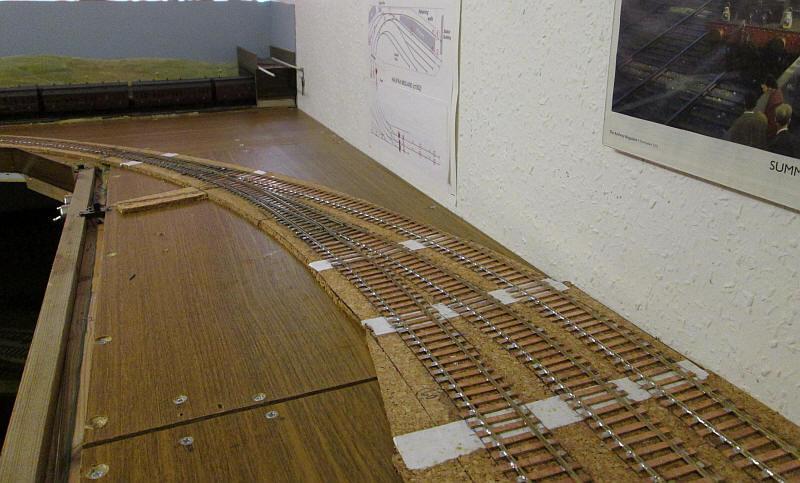
The curve's radius is 36 inches which most of my locomotives and rolling stock are happy with. The approach line splits into three using converted Peco curved points with an inner radius of 36 inches and an out one of 60 inches. The white strips under the track cover the gaps in the cork underlay. This is cut from cheap table mats.
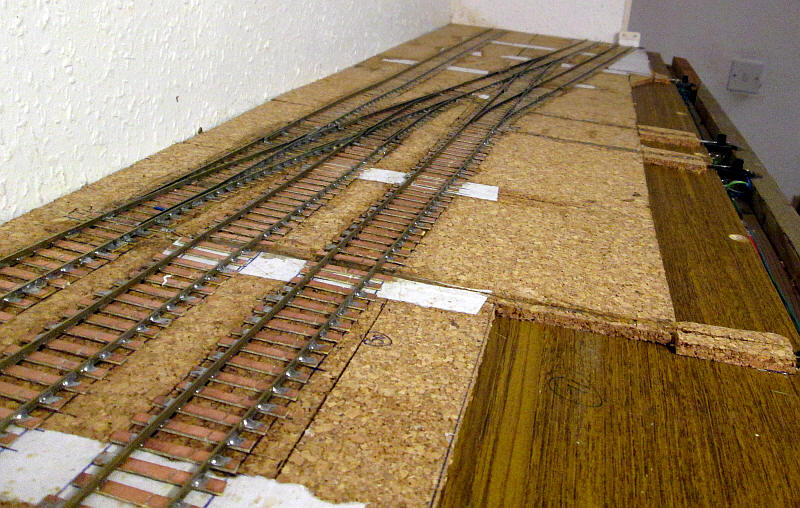
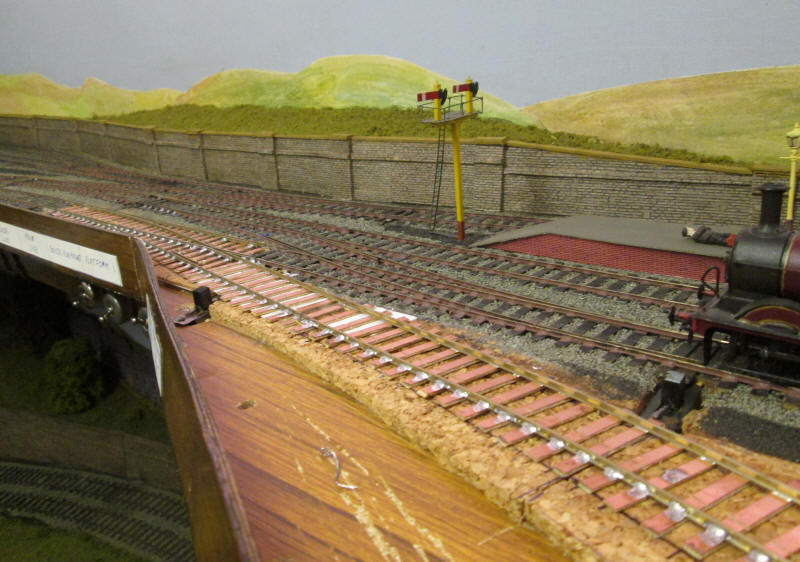
Looking the other way the three loop lines split into three dead end lines - the two outer ones will be freight sidings and the centre one is the locomotive release line.
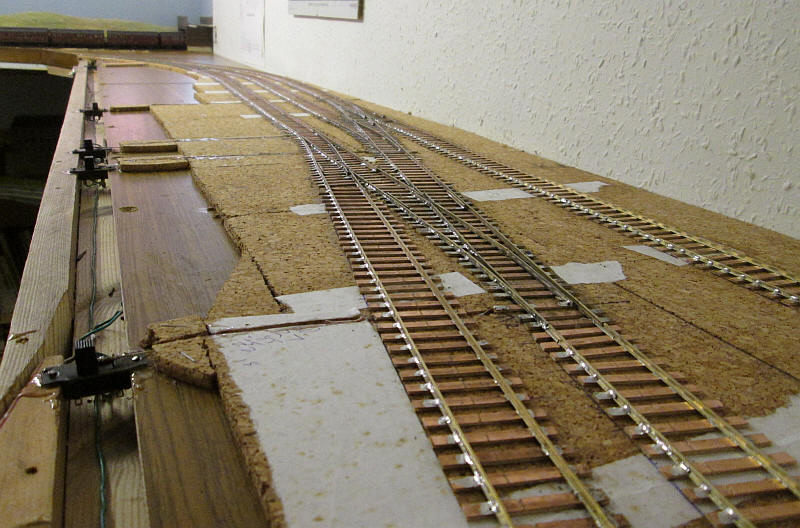
Looking from the end of the layout the thre epoints in view were converted from Peco large radius points and have an inner radius of 48 inches.
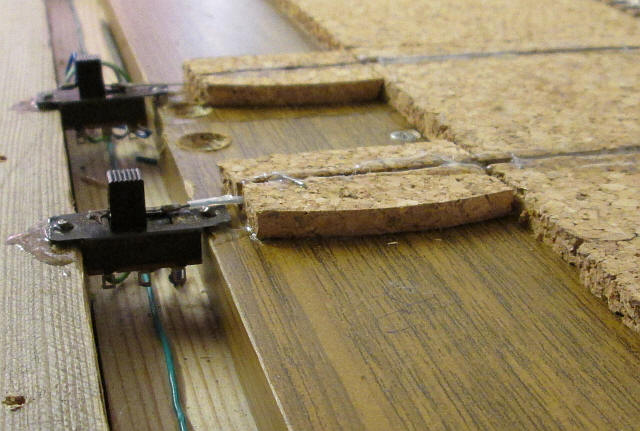
Points are operated by wire in the plastic tube method. The main baseboard uses an old piece of booksheld - half inch chipboard faced with melamine which then has two pieces of 50mm by 20mm timber screwed to it to make this channel. This gives space for all wiring to be contained in the channel. Short lengths of brass tube are soldered to the wires passing through the switch sliders and are soldered in the correct position to limit the movement of the point operatring wire.
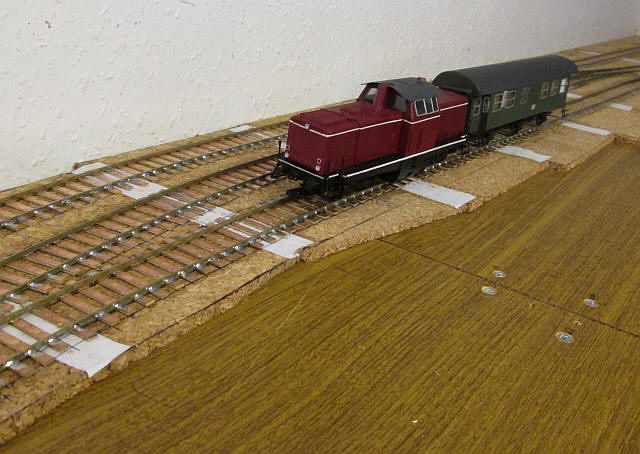
The first German train on the layout is the centre cab diesel and the first of four 6 wheel coaches that are under construction. Train lengths will be short; passenger trains can be of four 6 wheelers or three short bogie coaches. This was the typical German branch line train in the 1970s and 1980s. freight trains will be about 5 or 6 vehicles long.

I couldn't resist running a Midland train onto the layout and what is immediately obvious is how much more spacious this new layout looks with pre-grouping British stock.
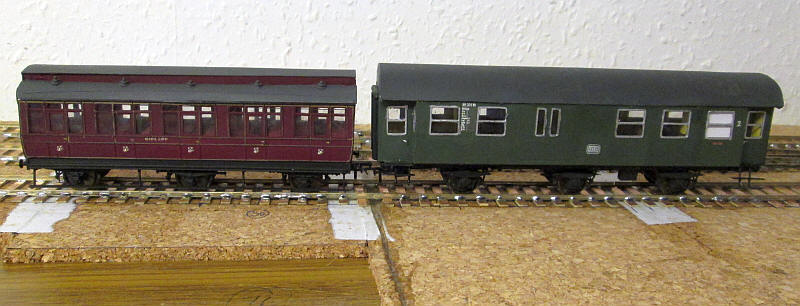
Nothing really needs to be said about the relative sizes of these two S Scale vehicles.
A different multi-location approach
My fascination with layout design in small spaces has now led me to adopt another approach with this layout. By using removable scenic modules and other visual tricks I intend to use this layout for two distinctive locations.
The first is the original German branch terminus with a low platform and timber station building in the foreground. The sidings will have loading ramps or what the Germans call Ladestrasse - flat paved loading areas. Passenger trains will use the front line, the centre line will be a loco run round line whilst the rear line will be used by arriving freights.
The British scenario will have a colliery theme. The rear siding will have a brick coal loading building over it with associated mine offices. The loops will allow storage of loaded or empty coal trains as appropriate. At shift changes a colliers' passenger train could also operate into the station to load/ unload its passengers at a low level platform. The MR six wheelers all had step boards that would allow this.
The new layout and the existing Hebblethwaite layout will be separated visually by a backscene board running diagonally across the baseboard, thus preserving the visual integrity of both layouts.
There is of course a bit of a dilemma regarding the track on this multi-location layout.
British track is bullhead but both German railways and Peco us flat bottomed rail. One solution to this would be to leave the layout as built with just the flat bottomed rail whilst another would be to put solder blobs on the inside of the rails to give it more of a British appearance. Mmm...there's no real answer to this problem and it's just as well I'm not as bothered by such matters as some modellers!!