
Building a Deutsche Bundesbahn 'Silberlinge' Coach
Probably the most common of the Deutsche Bundesbahn's coach types was the 'Silberlinge' so called because of the pattern that was impressed on the stainless steel bodies which resembled a silver coin. Built between 1959 and 1980 they could be found all over Germany and on almost all train services except for the really long distance inter city services. Their principal use was however on regional, suburban and local trains. Most were eventually modernised and lost their distinctive exterior finish.
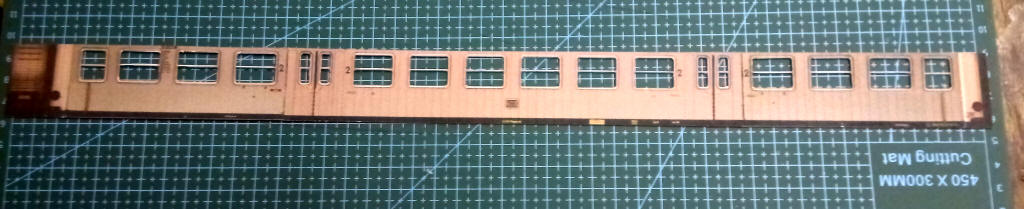
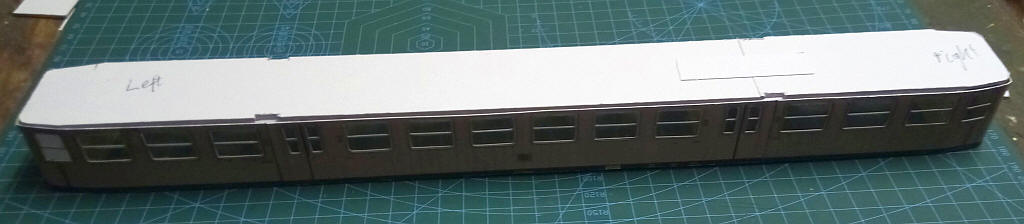
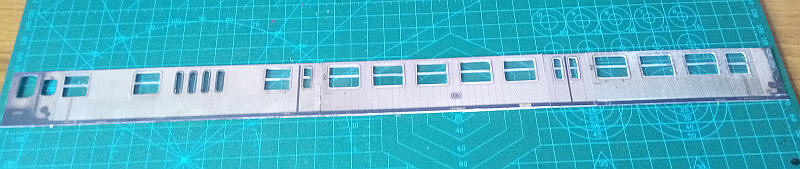
To scratch build these coaches is a challenge as representing the body side finish is difficult. In the end I decided to use close up photographs of models that I found on the internet. As the vehicles are about 16 inches long I broke the sides into three pieces.
One section was made from photographs of the short compartment at the ends of the coach with the ends spliced in between the end section as below:
The longer central compartment also included the double doors at each end.

It is obviously essential to get the height of each section exactly the same but this is easily done using a photo editing program.
After printing out on thin card the windows were carefully cut out and the centre window bar hardened by running superglue along the inside edge.
I now cut the end sections into two along the dividing line of the corridor connection. These will later be joined together when the body is assemble.
The three sections of the sides were joined together with strips of card under the body sides near the doors.
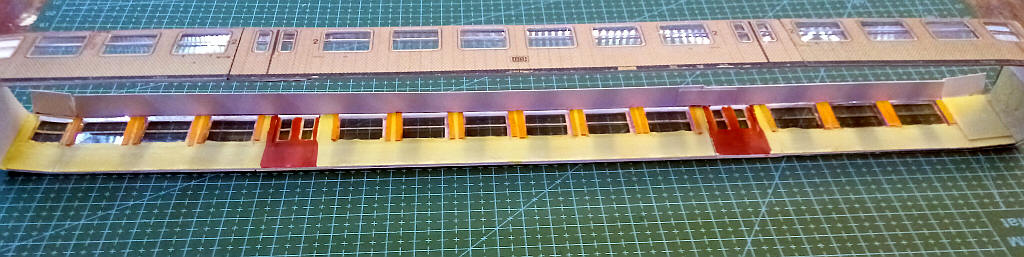
The glazing strip was now glued to the inside of the sides using tiny dabs of epoxy. A card strengthening pieces was added with the window areas cut out and a strip above the windows folded at right angles to act as a strengthening bar and a location point for the ceiling of the coach.
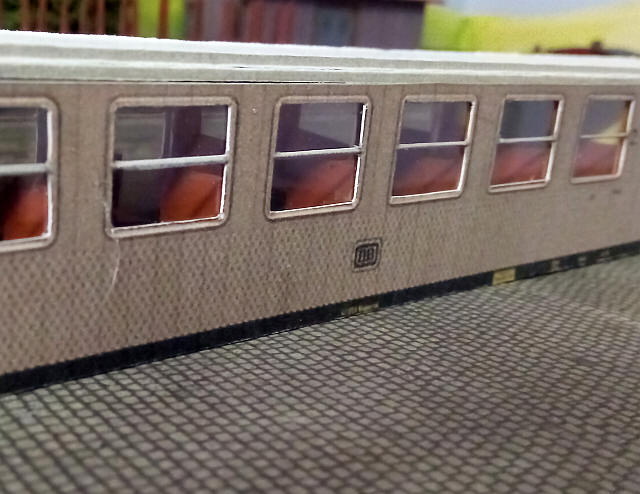
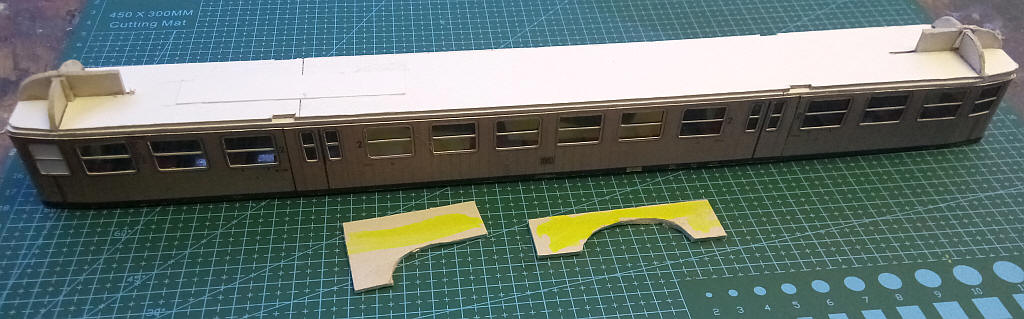
The ends have now been rejoined and the basic body shell is complete ready for the floor and ceiling. I've also added the orange curtains which were a distinctive feature of the real coaches.
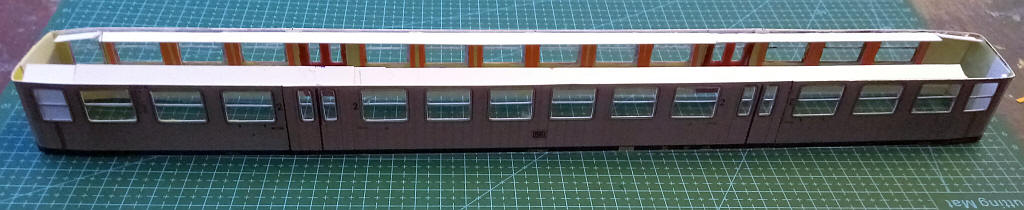
The carriage floor has been added - it is made from two layers of mounting card cut to fit tightly inside the body. Great care had to be used to get the doors on opposite sides to align with each other. The floor was permanently glued in place. Then the six internal partitions were glued in place after cutting out a hole to represent the sliding door windows. The toilet walls were added at each end and the walls in these areas and the door lobbies were painted light green.
The carriage ceiling was placed loosely in place to ensure that it still fitted correctly after the partitions had been added.
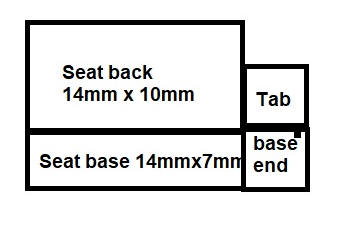
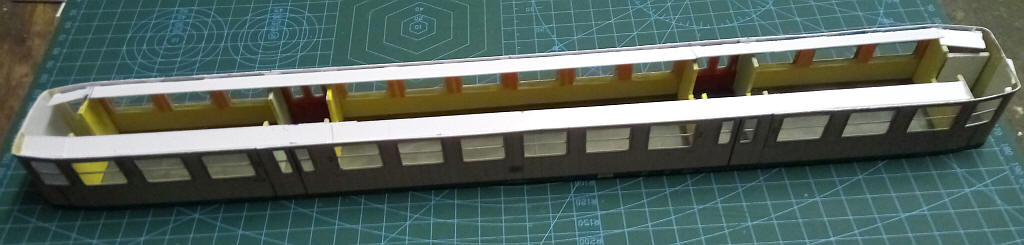
The Silberlinge had a considerable number of seats - 96 in total in the second class coach plus some tip up seats.
I've modelled them by making 48 double seat units using the net above. The mode seats were supported at one end by gluing them to a representation of the heating duct that runs along the side under the windows. The seats at the end of the compartments were simply glued to the compartment walls. The rest of the seat units were glued back to back before gluing in place - a touch of epoxy underneath the base end fastened them to the coach floor and another dab held them against the heating duct.
The seats were painted in the reddish brown of the original seats.
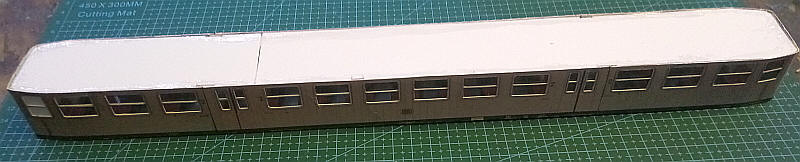
The body has now been sealed permanently with a ceiling made thick card glued in place on top of the longitudinal tab above the windows. A thin layer of epoxy was also spread along the joint between the ceiling and the top of the body sides. This will ensure that the card above the windows stays completely straight.
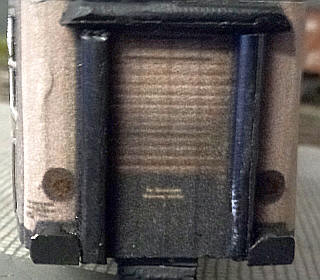
The roof is going to be a separate unit to avoid damaging the body whilst it is constructed. I've cut two templates - one is for the cross section of the roof and the other gives the end profile for the domed ends of the roof. The transition between the end domes and the rest of the roof has been marked by adding curved profile strips.
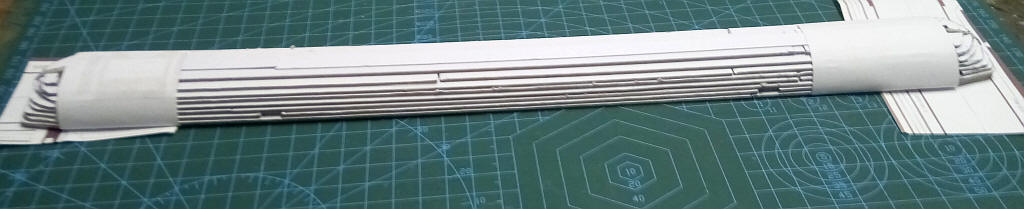
The roof profile has been built up using strips of mounting card. At the ends the domed shape will be built up using epoxy resin filed to shape. In the photo I've masked off the end from the rest of the roof ready to begin this process.

The roof is now complete with the domed ends filled with epoxy resin and sanded to shape, the main part of the central curved roof is thin card sheet reinforced underneath with epoxy. The ventilators and rain strip are plastic strips.
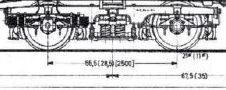
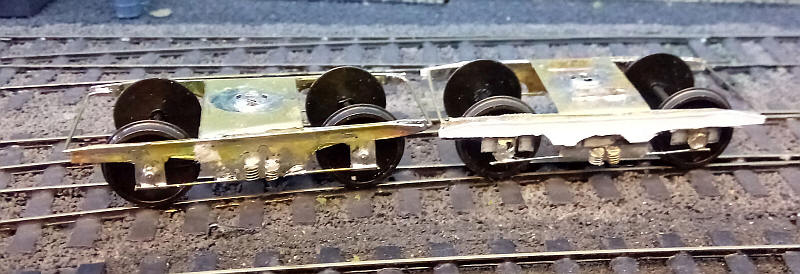
The bogie side frames and centre stretcher bar are made from a single piece cut from brass sheet and then folded into a U shape. The springs in the centre are short sections cut from a brass bolt and soldered onto the side frames. Brass wire is soldered across the ends of the side frames and a length of wire soldered along the top of the side frame on the front to represent the strengthening bar on the original bogie. A thin piece of card cut to the shape of the side frames as in the small diagram above and glued to the brass. This includes a square shape either side of the axle boxes which is presumably a type of compression spring.
Another thicker piece of card was cut out for the shape of the heavy main frame and glued on top of the thin card.
The corridor connection and buffers have been added.
The corridor connection are circular section plastic from 4mm scale wagon kits.
The buffers are made from nickle silver sheet cut to the correct shape and soldered to a length of brass tube. The tube is the passed through a short length of plastic tube from a biro pen and glued into a hole in the lower body.
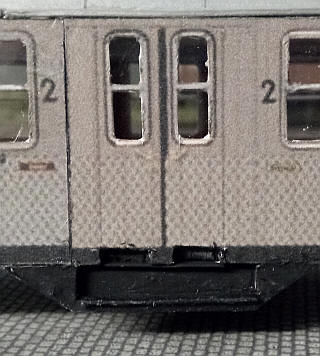
The rather complex steps for the doors were made by:
Removing a small about of the body side under the door so that there was a recess.
A strip of thin card was glued in place under the body for the top step.
The outer step support with its triangular ends was added together with a backing piece of card.
This was then glued in place under the doors with strengthening pieces behind to hold it vertically in line with the body side.
A thin strip of card was glued to the step cut out.
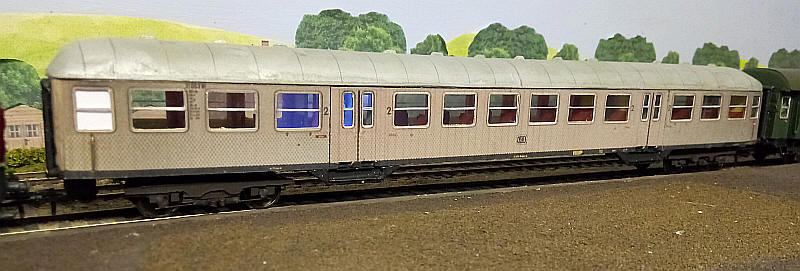
The model is now largely finished with just a few underframe details to add. The roof was secured to the ceiling of the body with epoxy resin and held tightly in place with elastic bands. The handrails above the shunters' steps are nickel silver. The roof was painted with Humbrol silver and then the panel lines drawn in pencils. Finally a dirty grey/brown wash was applied to tone down the silver to the more typical grey of the original roofs after the end of steam.
Steuerwagen
On many German branch lines the Silberlinge were run in push-pull format to avoid having to run the locomotive around the train at the terminus. Therefore I need a Steuerwagen (in British terms a control car or driving trailer). These have just over a third of the vehicle given over to a cab and the conductor/ luggage van area. This results in the centre passenger section being reduced from six bays to five.
The sides have been made in exactly the same way as for the full second class vehicle. A problem I encountered was that the print out I used for the cab end of the vehicle was significantly lighter than for the passenger sections. After spraying the sides with matt varnish (to fix the colours) I then applied several washes of light brown enamel paint to the cab section. This produced a finish which was virtually identical for the whole of the side.
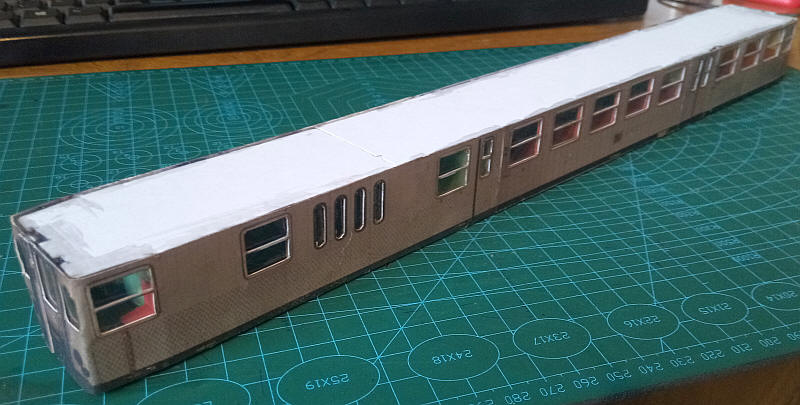
The basic body shell is now complete with the interior built in the same way as the full 2nd class vehicle. The false ceiling has been glued to the tabs along both sides and the gap between the body sides and the ceiling have been filled with epoxy to give rigidity to the sides
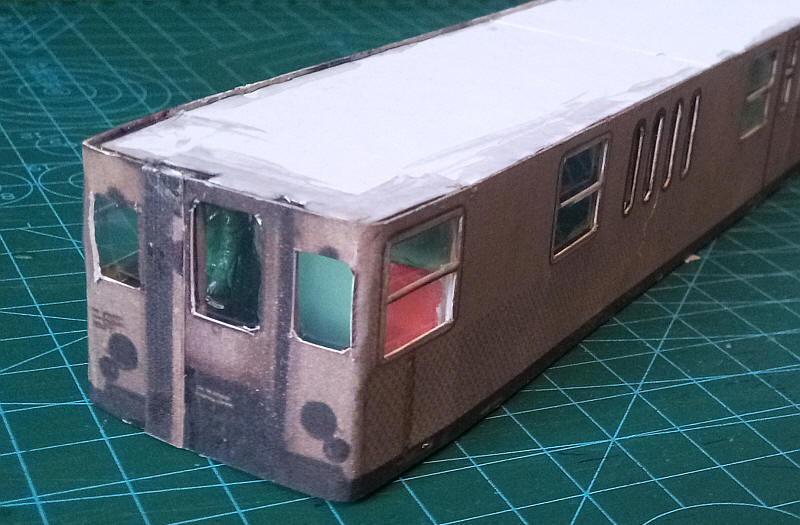
The cab is fitted with a control desk and two seats. The driver is sitting at one of the seats and can be seen through the centre window.
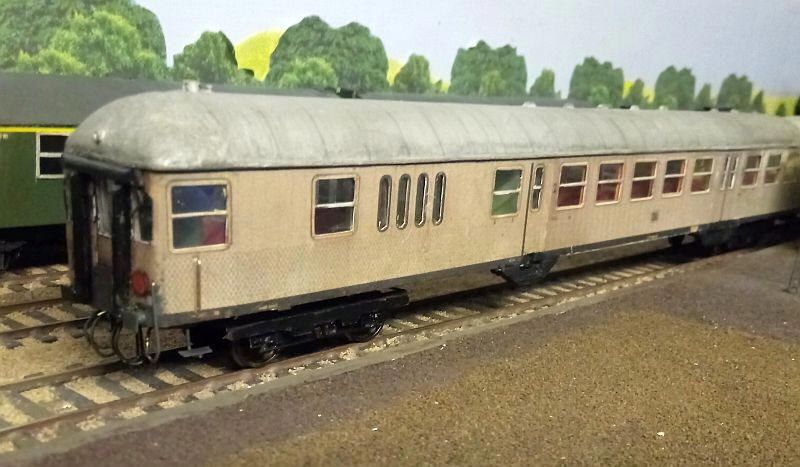
The rest ofthe construction is largely the same as for the second class coach so I won't repeat it. This is the finished model with among other things the brake pipes, electric train heating cables and shunters step filling the large gap at the front of the coach.
This Steuerwagen (control coach) together with the second class coach now operate the Wendezug (push-pull) services on the layout with the BR212 providing the motive power. Amazingly, propelling the carriages around the sharp curves on the layout is trouble free as the Hornby type couplings which are bolted to the body floor and are free to swing on the bolt.