Building an Alan Gibson 'Crab' 2-6-0 kit
For my next BR London Midland Region locomotive, following on from the 'Patriot', I've decided to build a more typical locomotive in the form of a 'Crab' 2-6-0. I saw 140 of the 245 locomotives so it was a clear favourite to build one.
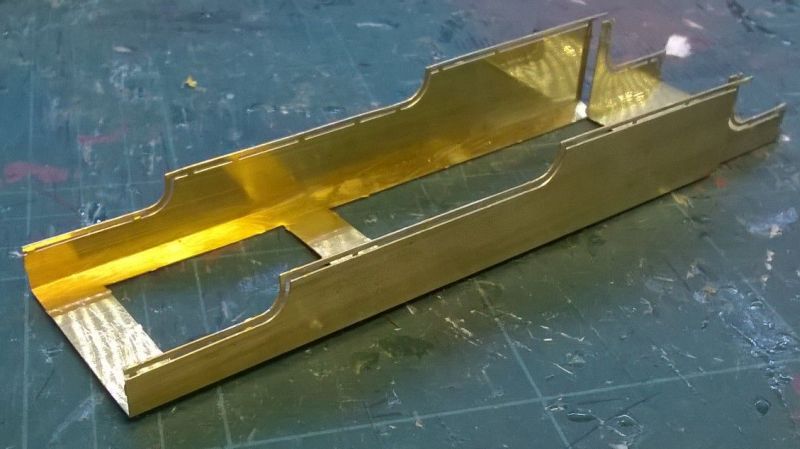
The construction starts with the folding up of the ingenious jig which holds the footplate valances in place whilst the footplate sections are soldered in place.

This is the result of several hours work with the six sections of the footplate soldered in place. Once again the instructions were extremely poor, not helped by the etchings not having all the part numbers marked on.
I've deviated from the instructions by removing the jig at this stage as all it did was to act as a heat sink for the soldering iron. The brass wires are temporary and are needed to hold the middle sections of the footplate apart at the correct distance.

As there was neither a boiler or firebox with this kit I had to make my own. As I dislike having to do heavy soldering, and because I've now built so much rolling stock in cardboard, I decided that the boiler was going to be made from card. I had a length of brass tube of the correct length but a few millimetres smaller in diamemeter which was used as a former.
The method I adopted was to coat the tube with vaseline to stop any adhesive sticking to it and to make it easy to remove the brass tube from the finished card boiler. A strip of paper was then wrapped around the tube and glued in place where the ends overlapped. I then cut a length of very thin cardboard and rolled it around the tube several times to pre-form the curve. A smearing of contact adhesive was applied on the leading edge and the card rolled until the first revolution was made. This was then allowed to set. The next stage was to cover the inside of the remaining length of the card with a thin layer of two-part expoxy and roll the card several times around the tube. This will need to be done carefully to ensure the card is rolled exactly in line with the edge of the tube. When the adhesive starts to set I rolled several elastic bands around the card to hold the end in place. The tube has now probably got about 2 or 3 layers of card wrapped around it.
When the first stage has hardened I repeated the process, this time butting up and gluing the next layer against the end of the previous one. The card had another thin layer of epoxy applied to it and was then rolled and secured in place as described above. Once set the brass tube should be carefully remove from inside the card. There are now about 5 or 6 layers of card strengthened by epoxy and the boiler tube is almost as rigid as the brass one. To make it even firmer the card should be painted with some wood hardener (as used for petrifying rotten wood).
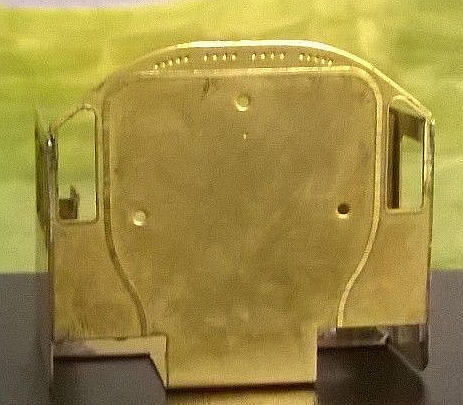
The 'Crab' has a Belpaire firebox with a profile as shown on the front of the cab. The firebox is also exactly the same width as the boiler so this has to be born in mind when fabricating the firebox.
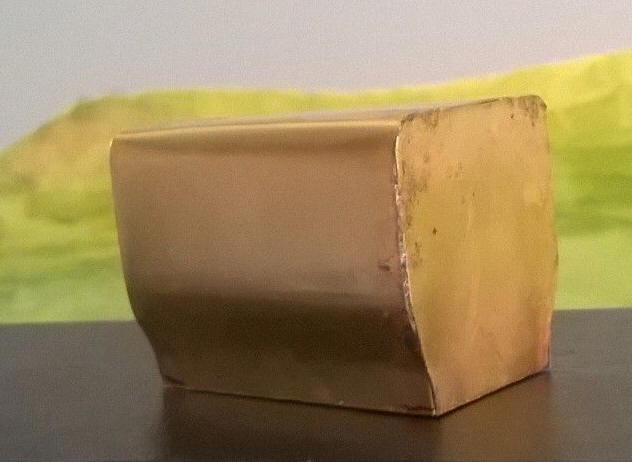
I used a similar technique for making the firebox as I did on the 'Patriot' model, although the 'Crab' has a much more complex shape. An end profile were cut as accurately as I could from thin brass sheet. Next a firebox wrapper was cut to the correct width, but longer than will actually be needed as it will be trimmed later. The wrapper was then carefully formed using screw driver shafts and finger pressure to the correct profile on one side and along the top of the firebox. It was then soldered to one of the end profiles with the wrapper being outside of the profile piece. Once secure the other side of the firebox was gradually formed to shape and soldered in place.
Then the front profile of the firebox was cut to shape but slightly bigger as this time it needs to overlap the edges of the wrapper because the front edges of the firebox are curved and will need to be filed to shape. There needs to be plenty of solder used inside the front former to allow this to be done. At the stage shown in the photo I have don't this yet.

The photo above shows the cab, firebox and boiler in their correct positions.
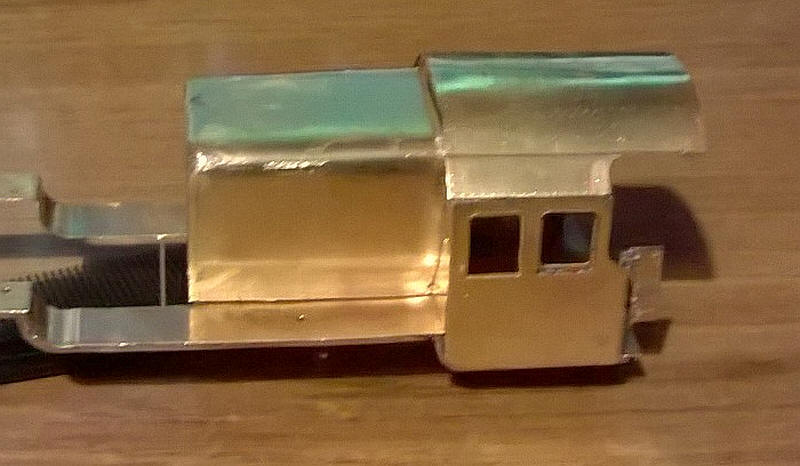
The cab roof has now been added and the firebox is attached to it and the assemblage is seen placed on the footplate. The front edges of the firebox have been rounded at the corners to match the profile of the real locomotive.

The boiler now has a disk of thick mountain card cemented in place at one end and two holes have been drilled through the front of the firebox and through the end of the boiler. The nuts are in place to hold the bolts in place whilst the epoxy securing them inside the boiler hardens.
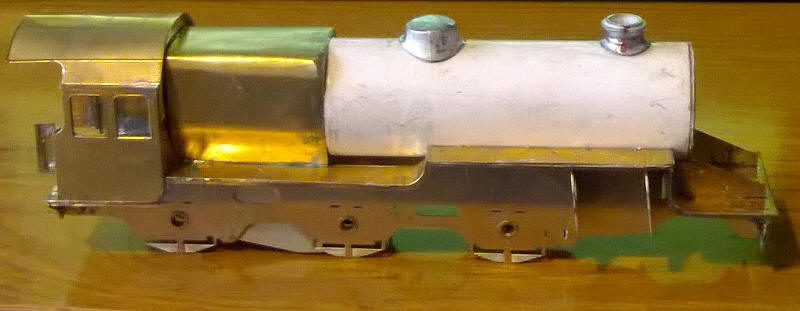
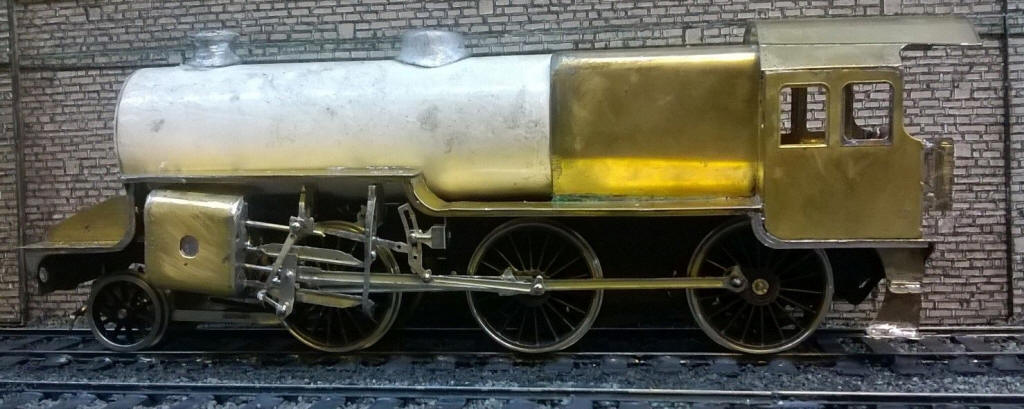
The frames have now been assembled (although the instructions were very poor especially about the placement of frame spacers) and I've slotted the front and rear etches for the cylinders in place. The boiler was bolted to the front of the firebox and then secured to the footplate using short lengths of wire passed through holes drilled in the boiler and soldered to the underside of the footplate. The boiler was also secured to the underside of the raised footplate with copious amounts of epoxy resin.
The chimney was modified from an S Scale Stanier chimney cut in half and then glued back together and filed to a profile roughly similar to the ones on the Crabs. The dome was also a modified Stanier 2-6-4T dome.
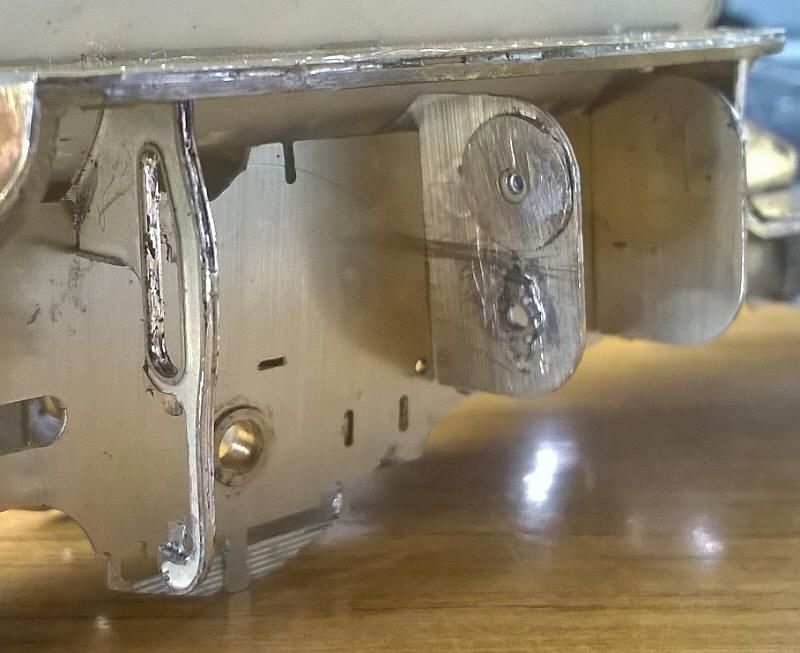
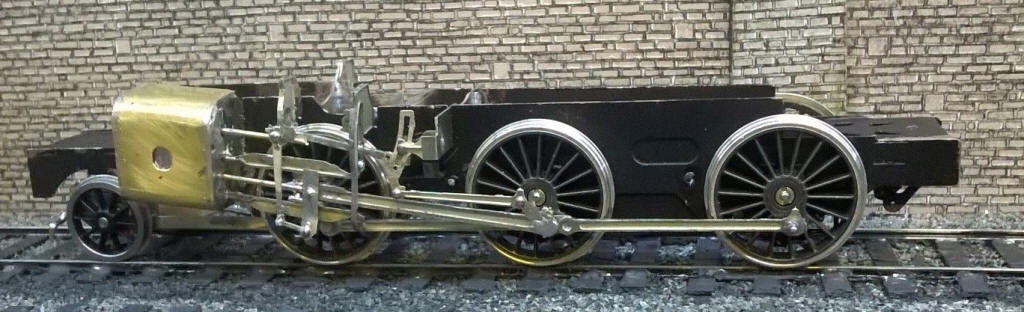
Construction now returns to the chassis with various parts being soldered to the cylinders as well as the construction of the motion and slidebar brackets. It might not look much but there is actually over an hour's work here.
The Crab has wheels! Initially I used Alan Gibson wheels in conjunction with Ronford crankpins just as I did for the Patriot. However, later on I decided to change these for Romford/ Markits wheels for reasons explained later.
However, in case anybody reads this the procedure with Gibson wheels was as follows. I opened up the crankpin holes in the plastic wheel centres with a small drill in a hand vice and then tapped the thread with an old thread tapper I haven't used for years. The Romford crankpins screw in easily and are secured with a drop of Loctite. Quartering of the wheels was done by first getting the front two wheelsets aligned roughly at 90 degrees and then placing the coupling rods in place held onto the crankpins with short lengths of insulation from a mains wire lead. A little tweaking was necessary but once these rotated smoothly the rear axle was aligned in the same way. Having got the chassis to roll smoothly I opened up the holes in the rods a little larger to give just a little more slop.
The cylinder and motion brackets were pushed back into the slots in the chassis and it was obvious that the coupling rods were catching on the bottom of the motion bracket. A little tweaking solved that problem but I'll need to be aware of that when the slidebars are soldered to it.
Test running with a motorised tender shows that the Crab negotiates almost all the track satisfactorily with just a couple of tight spots on the points in the yard needing attention.
The pony truck has now been added and seems to track well even without any added weight. That chimney definitely needs some work on its profile.
It was at this stage that I realised that I'd forgotten some of the problems (and solutions) that I came across when I was building another of Alan Gibson's kits, the Patriot, with outside valve gear.
Because I'm not building the model to "finescale" standards when the slidebars were fitted to the cylinder forms the crankpins on the front axle caught on them. Time for a rethink!
The solution was drastic. I cut the cylinder ends (which act as a chassis spacer) in half and altered the slots so that the cylinder would be moved about 1mm outboard of the frames to give enough clearance behind the crossheads and slidebars. The same was necessary for the motion brackets.
A change of wheel manufacturer
It was at this stage that I realised that Gibson wheels and I don't get on, especially on a loco with outside valve gear. I decided to use Romford/ Markts wheels using the S Scale Society's extended Romford axles. Within a couple of days I had the axles from the society and Markits sent me some wheels 24.66mm diameter wheels that are intended for A2/ B1 and V2s in 4mm scale. They have one more spoke than the Crab but I can live with that in exchange for wheels that are solid metal and quarter automatically on the square end of the axles.
Despite the wheels fitting easily and the chassis rolling beautifully when the coupling rods were added I still experienced difficulties with the valve gear at first. However, on RM Web there is a description of building the chassis of the Crab in O Scale with photos of every stage. This was invaluable as the instructions with the kit are truly terrible and without the detailed photos on the website I don't think I would have produced a rolling chassis as easily.
I decided not to take photos of every stage of construction but under the photo there are details of the main steps.
There are no crossheads in the S Scale Gibson kits so I had to make mine up by soldering various pieces of nickel silver and brass wire together.
The various pieces of the valve gear were all held in place with steel LIL pins soldered in place, cut short and filed smooth(ish!)
Several of the slots in the top of the chassis had to be deepened so that the boiler would fit in place. This was a fault in the design and was one I found on the Patriot as well
After assenbling and testing the valve gear on one side for smoooth running, the other side was tackled in exactly the same way. To my surprise the chassis rolls smoothly when it is propelled by one of my powered tenders.
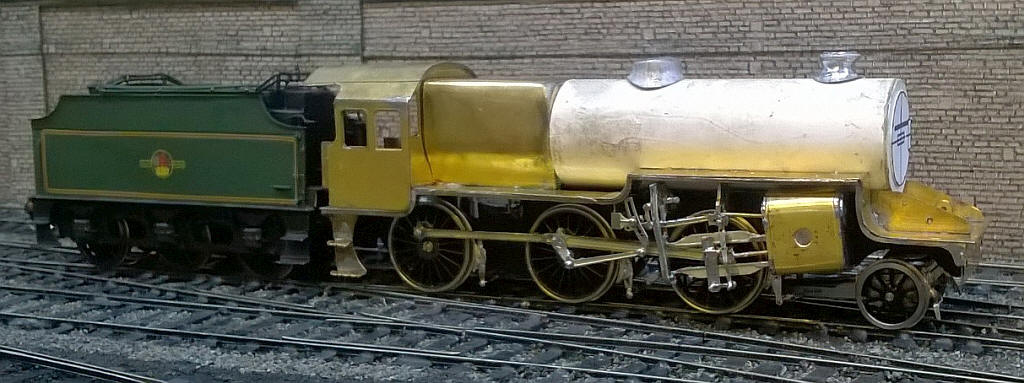
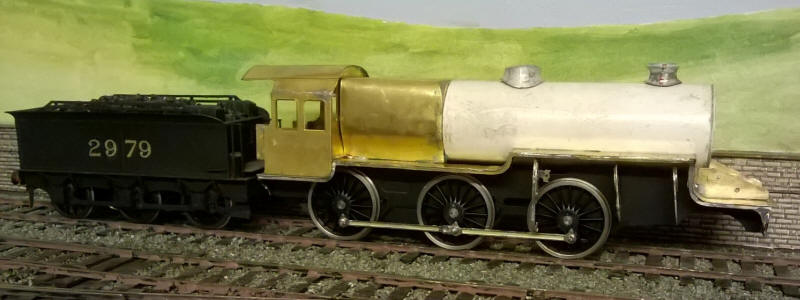
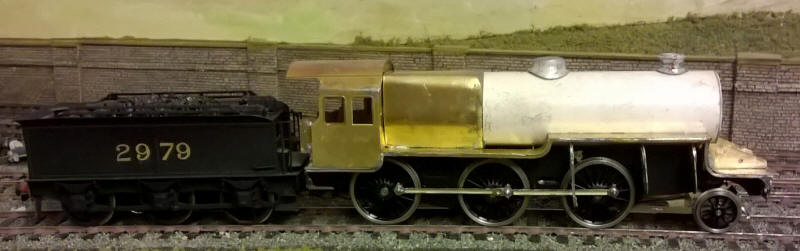
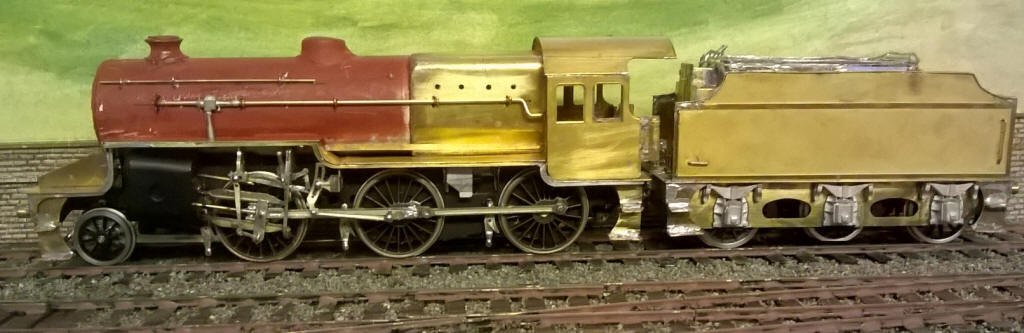
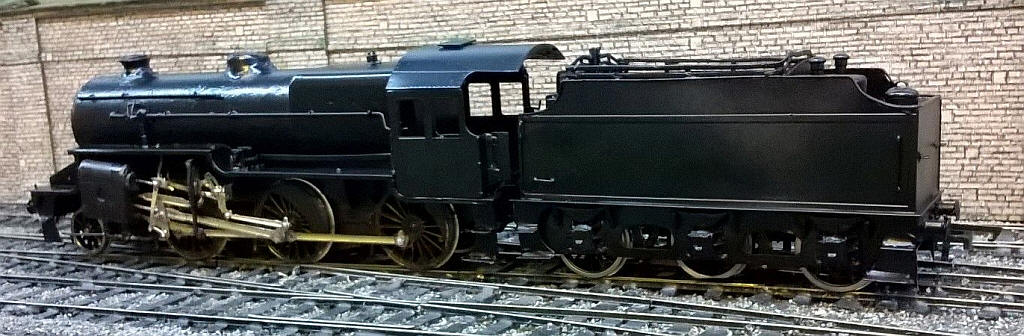
A few more parts have been added including the brake gear and I've coupled the loco to the Fowler tender of the Patriot to give an idea of what the finished loco should look like.
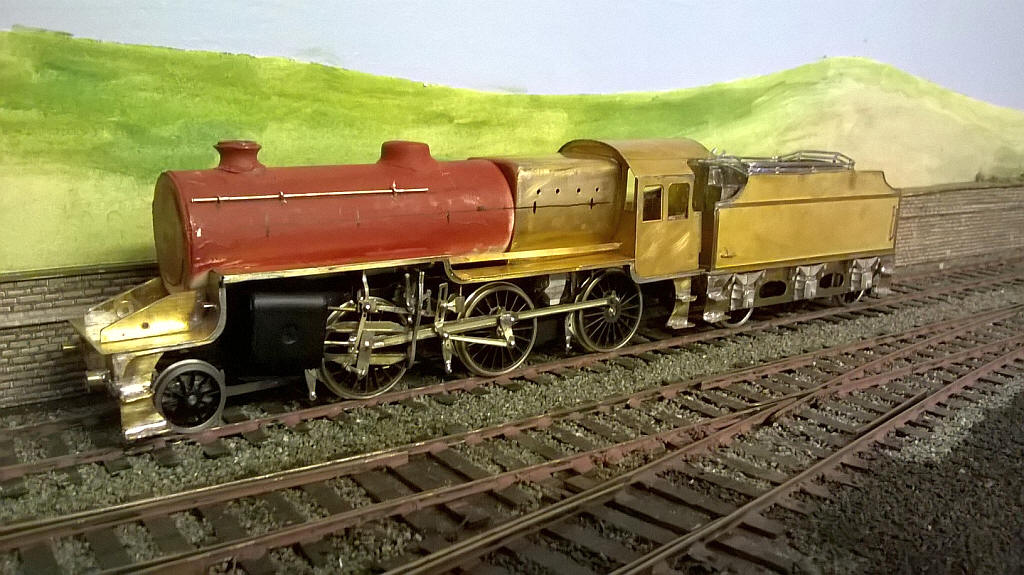
I've moved on several stages now. The Crab's tender has been constructed and is powered using two Mashima motors driving the outer axles through Markits gearboxes.
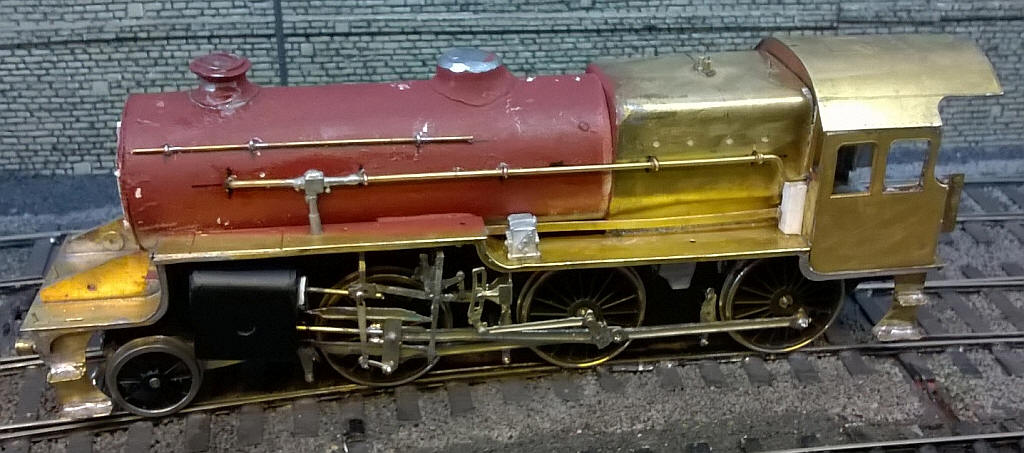
The holes for the fusable plugs in the firebox have been drilled and the large rear sandboxes fitted. The handrails over the raised footplate are in place with the handrail supports being copper wire wrapped round the handrail and held in place with solder and secured in holes drilled through the card boiler tube with epoxy resin.
The pipe which doubled as a handrail has now been fitted. It's from a length of 1mm brass wire with a white metal casting spliced in and soldered with low melt solder to both the brass wire and the footplate.
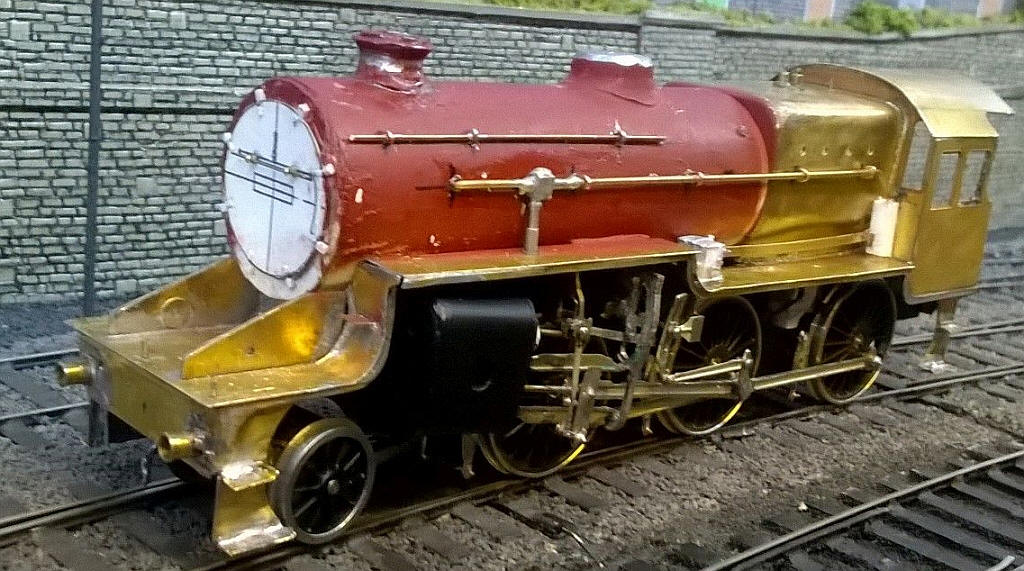
This side on view shows up the incorrect shape of the chimney and the lopsided profile of the dome casting. These will need attending to.
The smokebox door has been built up with another layer of card on to which has been mounted the handrail and a represenation of the door hinges and the cleats that lock the door. These are all made from small pieces of plastic strip.
The safety valves were made by soldering two dress making pins to the underside of the firebox. Then two washers were glued to the top of the smokebox and 2mm long lenths of brass tube slid over the pins. The pins were then cut to length. The whistle and the lampirons on the buffer beam were all made from steel pins.
The lubricators are white metal castings as supplied with the kit.
A backing plate of plasticard was glued behind the holes for the fusable plugs inside the firebox.
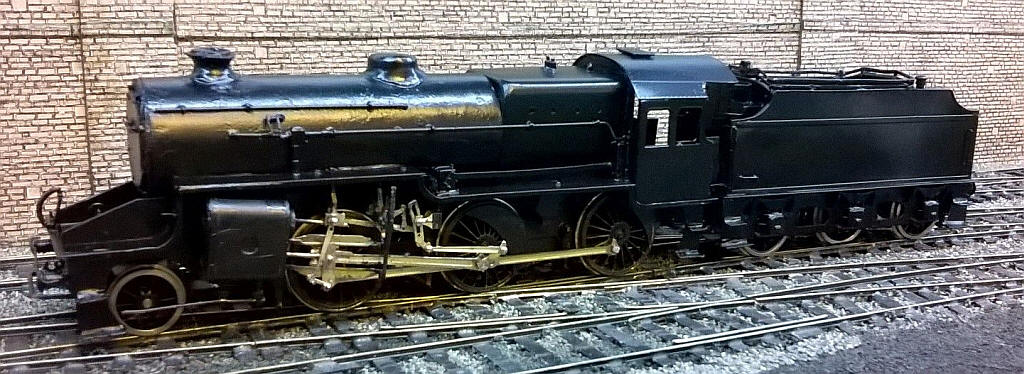
Things have moved on with the model now painted in satin black (it says satin on the spray cab but looks more like gloss to me, which will be good for locating the transfers on).
A bar coupling from 1mm diameter brass wire has been soldered to the front buffer beam in case I want to get the loco to pull a train when working tender first. A Hormby tension lock coupling, mounted on a thick pad of plasticard, is secured with a long bolt that holds the rear of the tender chassis to the body. Odd metal details such as the pipework on the side of the boiler, the water dome and filler cap, together with the tank vents on the tender have been added. On the loco a cab roof ventilator, wheel splasher covers in the cab and a representation of the firebox backhead have been added from plastic.
The card boiler was quite badly marked in places with almost invisible marks from adhesive, which after painting became very noticeable, so a lot of work with wet and dry paper was needed to get a satisfactory result. The final finish is still not as good as metal but at least the concept of a card boiler has been proved to work.
Even after some work the chimney is still not quite right for a Crab but, as some of the class carried a Stanier chimney, I'm going to accept it.
Now for the lining and lettering using waterslide and pressfix transfers!
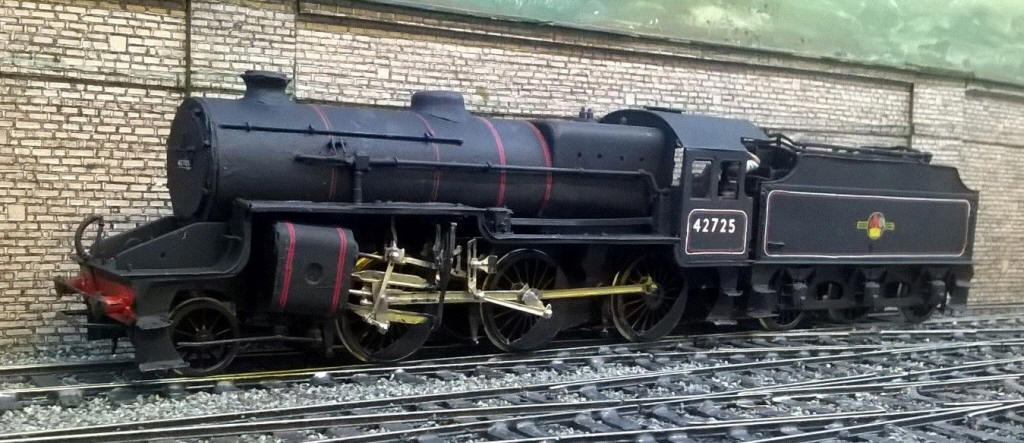
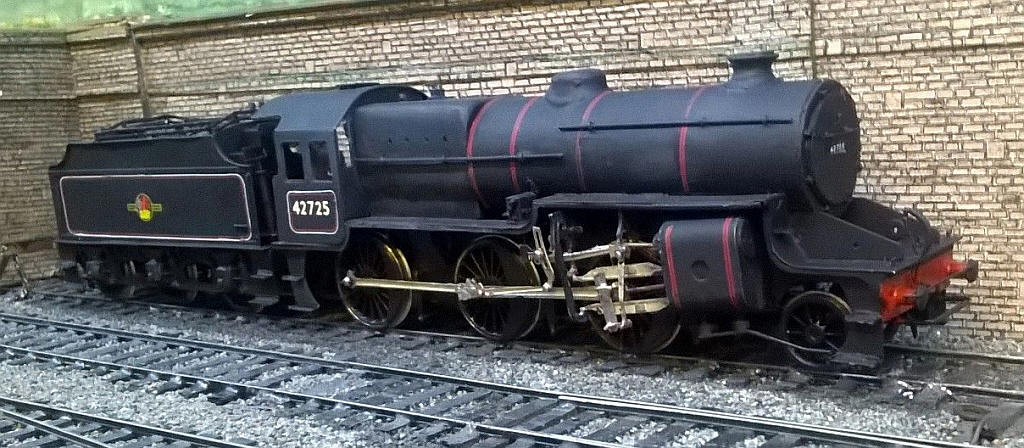
Well the Crab is finished - there is a crew in the cab, glazed windows, coal in the tender and a smoke box numberplate with tiny number transfers. I don't intend to do any further work on the model. It's full of errors, some of which are mine own, and others those in the kit design but I've now got a useful mixed traffic loco. Above all it runs like a dream.
Number 42725 was tested at the Rugby Test Centre in the 1950s and is noted in the RCTS history of the LMS 2-6-0s as having a Stanier chimney so that's one thing that I don't have to worry about.